 The rising popularity of video gaming has also increased the popularity of video game reviews, strategy guides, and walkthroughs. In the past, most of these were written and published in either books or video game magazines. But gamers are now turning to video-sharing sites like YouTube to share this information with other gamers.
If you missed last week’s post, avid gamer & ImOn employee, Jacob C. shared tips on what you need to be a video game streamer. He explained the computer and Internet speeds required, different capture devices, and the streaming software needed to become a video game streamer on sites like YouTube and Twitch.TV. In the post, Jacob also mentioned a free and open source streaming software option called OBS Studio. Jacob actually uses this site for his own video game streaming.
For those of you not familiar with OBS Studio, OBS stands for “Open Broadcaster Software” and was made by gamers for gamers. It was designed for recording and streaming live video content to allow users to share their gaming, art, and entertainment with the world. It also has other practical uses besides just video game streaming.
For those of you interested in trying OBS Studio for your streaming, here are a few tips from Jacob on how to configure your OBS Studio settings for the best quality video streaming possible. If you aren’t familiar with OBS Studio, check out the variety of tutorials on the OBS Studio Website.
Configuring OBS Studio for Video Game Streaming:
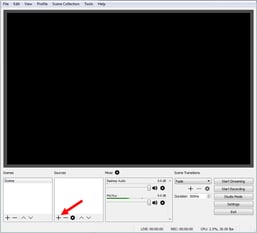
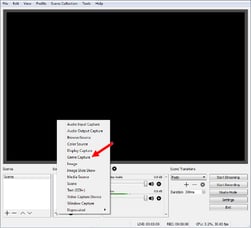
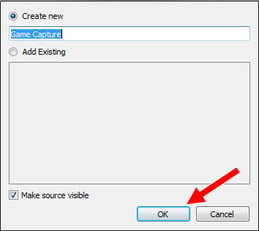
- To add a source, click the ‘+’ symbol under Sources. A source can be anything from your game, to a webcam, or your computer screen. Basically anything you want visible on your stream. For now, select Game Capture. You can come back here later to add additional sources. Feel free to name this source whatever you like. When finished, click OK.
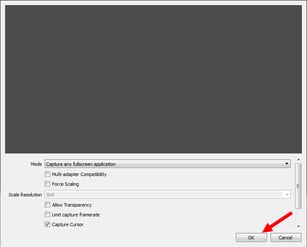
- The next screen lets you configure what type of window to capture. By default, it will capture any full screen game. When a game is running, you’ll be able to select the specific game from the Mode drop down. When finished, click OK.
- Now that we have a game added, let’s go into the Settings to configure our stream.

- Click on Stream in the Settings menu. Select your preferred streaming service and enter your Stream Key. Your Stream Key can be found in the account settings for your stream service.

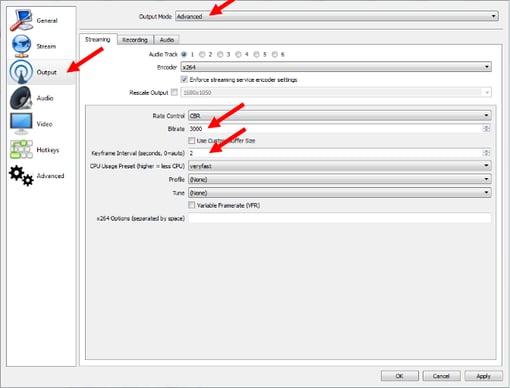
- Next, click on the Output Change the Output Mode to Advanced. This will give you additional output options. Set your Bitrate somewhere between 2000 and 3000. The higher the Bitrate, the better your stream will look. However, viewers with a poor Internet connection may have trouble watching a high bitrate stream. Make sure to set your Keyframe Interval to 2.
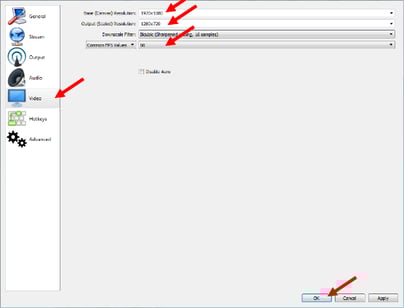
6. The last settings you’ll want to change are located on the Video As most videogames are played in a 1080p resolution, set your Base Resolution to 1920x1080. Change the Output Resolution and Common FPS Values to match your needs. Some popular configurations are: 1280x720 at 30 FPS, 1280x720 at 60 FPS, or 1920x1080 at 30 FPS.
The settings that work best for you will largely be determined by how powerful your computer is and how clear you want the stream to be. Most people agree that a 720p video at 60 FPS looks better than a 1080p video at 30 FPS. When finished, click OK.
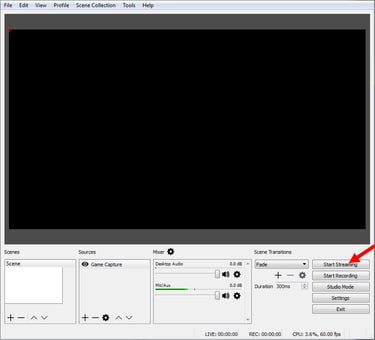
7. When you’re ready to stream, click the Start Streaming button.
For more details, check out Twitch.TV’s OBS Guide